The release of Microsoft Flight Simulator in 2020 and the events coinciding with it sent the world into a frenzy. Simmers set about upgrading their PCs and building home flight simulators to fully enjoy the beautiful yet punishing reboot of the Flight Simulator series. Hardware sales rocketed up, so much so that Jon Peddie Research (JPR) predicted a staggering $2.6 billion in hardware sales associated with Microsoft Flight Simulator alone.
If you are one of the people looking to build a flight simulator in their garage, I have good news for you – building one has never been easier. Gaming PCs are fast, displays are cheap, controllers are plentiful, and the software is exquisite. Furthermore, there are websites solely dedicated to helping people build home flight simulators and connecting them to an endless community of virtual pilots.

Yet if you have any doubts, this how-to guide on building home flight simulators will clear them up. In this article, we will go over the basics of flight simulation, the major components needed to create an effective flight simulator, and how to select these components from a dizzying array of options. So, without further ado, let’s get started.
Step 1: Understanding your Goals
People build home flight simulators for a variety of reasons. Some, like pilots and student pilots, want to stay proficient in Instrument Flight Rule (IFR) procedures. Others pursue virtual aviation as a hobby, soaring the skies in their free time. While the latter can compromise on precision and accuracy, the former need to get the best equipment to make the most out of their free time by practicing navigation skills and procedures.
Irrespective of whether you are a pilot/student pilot or a simulator hobbyist, you need to have some visual image of your end goal, i.e., how you want your flight simulator to look, before you get started. If you are building a flight simulator for a plane you fly most often, this would be an image of the cockpit of that plane. Once you have that, you can proceed to budgeting for both price and space.
Step 2: Budget for Home Flight Simulator Cockpit
A home flight simulator can be as simple as a joystick in front of a laptop. It can be as comprehensive as a replica of an actual aircraft. Needless to say, your investment will vary depending on the level of realism you want to attain. It can be as less as a thousand bucks, and can also go well north of tens of thousands of dollars.
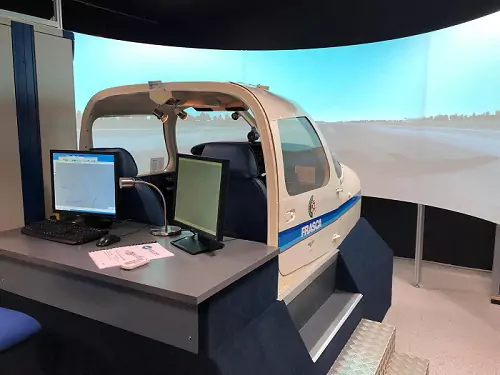
Similarly, you have to budget for space. If you are building your simulator in a spacious garage, everything goes, but what if you have to build it in your already cramped room? Yokes are definitely off the charts and so are ultra-wide displays. All I am trying to do is to encourage you to account for these things before you set off buying components for your flight simulator.
During this guide, we will be recommending components that have been meticulously chosen by our editorial team and are suitable for a mid-size setup between 3 – 8 thousand dollars.
Step 3: Choosing the Software Platform
Once you have a thorough understanding of your end goals, you can set about taking action. The first thing you will have to decide is the software platform you are going to use. In this regard, Microsoft Flight Simulator 2020, X-Plane, and Prepar3D are some of the most popular flight simulator software going around.
Microsoft Flight Simulator 2020
Developed by Asobo Studio, MSFS 2020 is the latest entry into the Microsoft Flight Simulator Series. The sim is available in 3 editions: Standard, Premium, and Deluxe across Windows and Xbox platforms. These editions vary in the number of aircraft on offer and the financial commitment you would have to make.
The widely acclaimed flight simulator uses Bing Maps and Microsoft Azure AI to create a replica of the globe with real-time weather conditions. Unlike other flight simulators that download data into the user’s PC, MSFS 2020 streams data from a cloud server. Hence, the game requires a consistent high-speed internet connection.
Of all the flight simulators out there, Microsoft’s Flight Simulator offers the best graphics – by a country mile. Even before the VR support came out in December 2020, it was being touted as the “best looking game ever”. So, it should hardly come as a surprise that the game is the best flight simulator for VFR flying.
Another advantage MSFS 2020 has over other flight simulators is the ease of use. The flight sim emphasizes user experience, and this is visible not only in flight but also when you are preparing to fly. The game has minimal to no learning curve and it only takes 4 mouse clicks to get the engine up and running on the runway 22 centerline. If that wasn’t exciting enough, the simulator offers plug-and-play functionality with 95% controllers.
One of the least talked about, but a highly advantageous, aspect of Microsoft Flight Simulator is the activeness of its developers and community. Major updates roll out fairly quickly, and there are innumerable forums dedicated to the sim where you could post and get your query answered almost instantly.
X-Plane 11
Developed by Laminar Research, X-Plane is the only flight simulator suitable for both Windows and MAC. The stand-alone platform is over a quarter of a century old and still going strong thanks to its ever-growing community.
X-Plane distinguishes itself from other simulators with its use of “blade-element modeling”. Most other simulators use the “look-up table” approach, which works seamlessly in linear situations, but fails in non-linear situations like stalls, aerobatics, and abnormal maneuvers, resulting in lousy and unrealistic handling of the aircraft. Don’t worry if you do not understand it; all you need to know is that blade-element modeling is more realistic and hardware-intensive than look-up table modeling. If you are a sucker for these types of things, however, and would like to read more, head over to medium where Eshka does a great job of comparing the two.
We also covered a comprehensive comparison of 7 Best Flight Simulators where we compared MSFS2020, XP11, P3D, and some other software. You may check that out if you are still in a decision for selecting the software for your flight rig.
Thanks to its modeling, X-Plane is more realistic than Microsoft Flight Simulator, making it a better fit for IFR flying. It is a better simulator overall if you are into simulation for training and not for its recreational aspects.
Another thing that works for X-Plane is the simulator’s age. After years and years of development, major bugs have been ironed out, making the game extremely stable. Paid add-ons are more accurate, although much more expensive as well. Things might change in the future, especially with MSFS 2020’s pace of development, but as of now, X-Plane is a more realistic flight simulator out of the two.
Prepar3D (P3D)
Jokingly referred to as the ‘FSX on Steroids’, Prepar3D has been developed by Lockheed Martin using the codebase of Flight Simulator X. Unlike FSX, though, the development of the simulator hasn’t stalled and updates are rolled out pretty often – the latest one (v5) coming out on April 14, 2020.
Aimed toward professionals, P3D greatly improves upon the FSX, offering better graphics (cloud shadows and more complex lighting capabilities) and more realism. Not to forget, P3D supports 64-bit processors, in comparison to FSX’s 32-bit), and can consequently make better use of modern hardware.
With a similar user interface, however, it’s hard to miss that P3D originated from the FSX. Don’t get me wrong, that’s not a bad thing at all. Indeed, with a similar codebase, most add-ons aimed at FSX also work on P3D.
It is worth mentioning that P3D is a more mature platform than X-Plane, and consequently has better add-ons. These add-ons, however, are quite expensive. So, only go for P3D if you have a few hundred spare dollars in the bank and have no compunction in spending them to fly with the most realistically simulated system.
Step 4: Set up the Flight Sim Cockpit
At its core, a gaming cockpit is just a specialized desk for the comfortable handling of computer, controllers, and peripherals that enhances the in-game experience. For setting up the cockpit, you have two options:
- Go DIY
- Buy ready-made panels
In this portion of the guide, we will explore these two options in detail, looking up the pros and cons of each.
DIY Flight Sim Cockpit
If you aren’t familiar with the term already, “DIY” is a cool acronym for a rather mundane “do it yourself”. Should you choose to go this way, you would have to piece together your home flight simulator from scratch.
The first step in building your flight simulator DIY cockpit is to specify requirements. If you have made it this far, I am assuming you at least have a mental layout of what you want to build. Succinctly describe these requirements in a document no longer than one page. Now model these requirements into a diagram, somewhere along the lines of the image below. It is worth mentioning that a computer-generated graphic isn’t mandatory; a rough hand-drawn sketch would do just fine. All you need is a diagrammatic representation of your idea for visualization. Review your diagram for changes, and once you are satisfied, you can move on to construction.
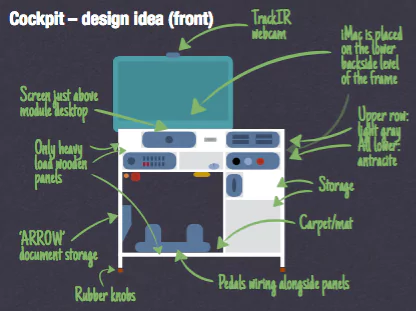
Here are a few tips for building a flight simulator cockpit:
- Look up the measurements of the actual cockpit you are trying to replicate. By replicating, I don’t mean reproducing the cockpit down to the inch. Even if you are trying to replicate structural elements of a cockpit, look up the measurements beforehand to ensure your flight simulator is close to the real deal.
- Measure your controllers and accessories. Before you move to the construction phase, you should have your hardware preferences sorted.
- A little aesthetics never hurt. Secure your wiring and try to add ambient details. In this regard, adding a carpet under your rudder pedals would greatly improve your home flight simulator’s outlook.
- Secure your chair so it doesn’t move.
An advantage of going DIY is that it is significantly cheaper. You can get what you need for a fraction of the cost. Given you have the tools needed for building the cockpit, e.g., tools to cut wood, shape metal, etc., you can make cockpits costing thousands of dollars within a few hundred bucks. The absence of tools, however, can increase the cost but even then, DIY cockpits are generally cheaper.
On the flip side, building a flight simulator from scratch is a hideous process. Even if you have your hardware and design preferences sorted, piecing together a cockpit is no child’s play and would take weeks if not months. Now compare that to ready-made panels which you could knock up within a day or two.
All in all, only go DIY if you are cash-strapped or have a penchant for long-term projects and are a pretty decent builder. Don’t get me wrong, building a flight simulator cockpit is an extremely rewarding process, but it is just not meant for everybody.
Buy ready-made Panels
An easier, albeit costlier, way to build a home flight simulator is to buy pre-manufactured laser-cut panels. All you have to do is mount them on a desktop, secure and configure some hardware, and (BOOM) you are good to go. If you are an experienced builder, you might even knock it up in an afternoon.
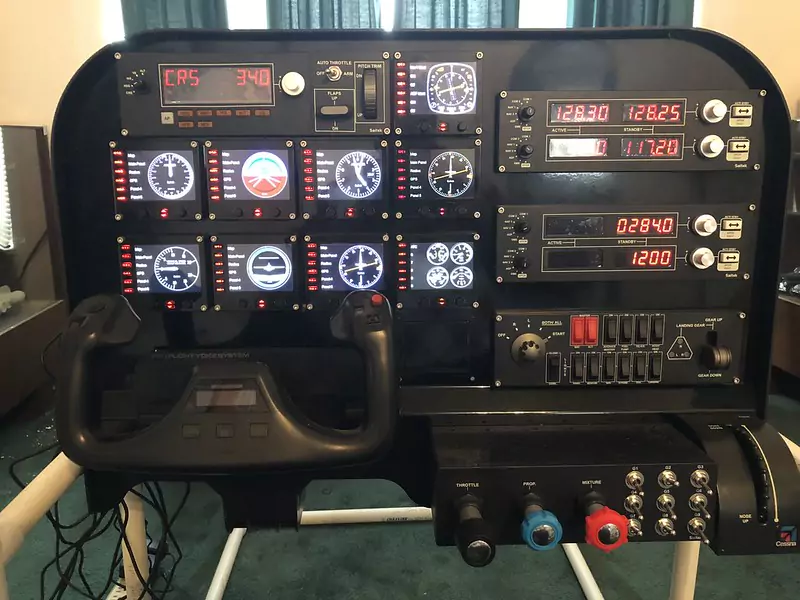
If you are in the market for ready-made tabletop avionic panels, you have a handful of company options including, but not limited to, Stay Level Avionix, Flight Velocity, and VolairSim. All of these companies offer multiple options with a plethora of configurations. Stay Level Avionix, for example, offers options for small/large, single-engine/multi-engine, and analog/glass cockpits. If you are feeling adventurous, you can even have one custom-built to support your hardware requirements.
A major issue with pre-built avionic panels is compatibility. A panel is only compatible with a handful of hardware options. Volair Sim’s avionic panel (V2), for example, is only compatible with 4 yokes, namely, Honeycomb Alpha, Yoko, Brunner, and Logitech/Saitek, and recommends using a monitor not larger than 27 inches (unless you use Volair Sim’s triple monitor stand, in which case the max size is 46 inches).
It is also worth mentioning that if you are trying to replicate a particular aircraft, look out for an avionics panel offering that aircraft’s perspective. For e.g., if you want a Cirrus SR22 in-home flight simulator, go for Flight Velocity’s FV22 Cirrus Perspective Kit.
Home Flight Simulator Examples
By now, we have discussed the two options for setting up a cockpit. The discussion, however, would be incomplete if we didn’t look into a few examples of home flight setups that simmers have built over the years using either of the two approaches. These examples would help you better visualize your requirements and provide a source of inspiration for your in-home flight simulator setups.
#1. Mina’s DIY Flight Simulator
For our first example, we will be featuring a home flight simulator put together by Mina Morcos-an aspiring youtuber who, in his own words, posts videos about ‘everything interesting in life’. Morcos’s setup has Logitech’s Flight Yoke and Throttle mounted to a standard computer desk. For Yaw control, Mina uses Logitech’s rudder pedals. Besides these controls, there isn’t much to the setup as you can see for yourself in YouTube video embedded below.
Mina’s home flight sim setup is pretty simple and requires no technical expertise. I would highly recommend it for people who are new to flight sims or do not have the budget, persistence, or desire for a more comprehensive set up.
#2. Lundy’s Desk Mounted Cockpit
A virtual aviation enthusiast, Lundy opted for a simple yet effective approach to building a home flight simulator. He used an ordinary wooden desk as a base to mount controllers and peripherals. In his setup, Lundy used:
- Honeycomb Alpha yoke
- Honeycomb Bravo Throttle Quadrant
- Logitech Pro Flight Rudder Pedals
- Logitech G Pro Flight Multi Panel
- Logitech G Pro Flight Radio Panel
- Logitech G Pro Flight Switch Panel
- Logitech G Pro Flight Instrument Panels
If you want to build a flight sim cockpit from scratch and have no prior experience in building things, I would advise you to do exactly what Lundy did. Not only is his home flight simulator easy to build, but it doesn’t compromise on realism either.
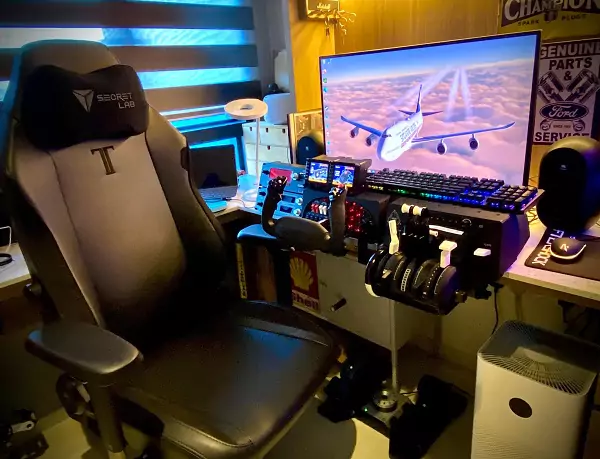
#3. Steve’s “Dream” Flight Simulator Setup
For our last example, we would be examining a home flight simulator built for IFR training by Steve Thorne of FlightChops fame. While the flight simulator setup lacks the bells and whistles of some of the premium home flight simulators, it is pretty effective and would surely make up for ultra-realistic flights.
Steve’s simulator features a custom Stay Level Avionix panel, Logitech Pro Flight Yoke and Throttle, and Logitech’s Radio and Switch Panels. The virtual cockpit is powered by a fairly decent rig made up of:
- Asus ROG Strix Z390-H Gaming Motherboard
- Intel Core i7 8700K
- Samsung Evo 970 250GB NVME SSD
- Asus ROG Strix 2080ti OC
- Corsair Vengeance RGB Pro 16GB DDR4 3200
- Corsair Hydro Series H115i RGB
- Corsair 500D Mid-Tower Case
- Corsair HX750 Power Supply
For more information about Steve’s home flight simulator, you can watch FlightChop’s video below.
Step 5: Purchasing Flight Simulator Hardware and Accessories
Having covered major points of contention and swam through a few home flight simulator setups, it is about time we dive in a little deeper and discuss the hardware and controllers you would need to replicate an authentic cockpit feel. The required hardware can be classified into 4 major categories, namely, computers, displays, controllers, and accessories. For each of these categories and a lot more subcategories, we would be identifying the top product tested and chosen by our editorial team. For thorough understanding, though, I would recommend taking a quick look at the linked dedicated guides on the topic.
1. Gaming Computer For Flight Simulator
The computer is the muscle of your setup, and inarguably its most significant component. Before you buy one, however, you would have to settle a few points of contention (Pre-built vs Custom built, Laptop vs Desktop) and decide upon system specification.
Pre-built vs Custom-built PCs
When shopping for a rig, you can either opt for a plug-and-play pre-built PC or dare to dream and customize your machine. Given the comparable prices, the choice ultimately comes down to where you stand on the convenience-customizability spectrum. While a lengthy discussion on the topic is beyond the scope of this guide, avoid custom-built PCs unless you have the technical expertise and persistence for building one. Researching components and building stable configurations is a tedious process and can often lead to catastrophic results.
Desktop vs Laptop
The unending laptop vs desktop debate is another point of contention, but one that is not directly related to a home flight simulator. Sure, you may fancy a laptop’s portability and its dynamic array of uses, but from a strictly home flight simulator point-of-view, a laptop is only as good as a desktop with comparable specs, or is it? In recent years laptop processors may have caught up with desktop processors, but the latter are still more powerful. Based on your other uses, however, you may opt for a laptop but you will have to pay a premium for that.
System Specifications
Once you have decided between the aforementioned points of contention, you can move on to system specifications. While the minimum specs of the computer are closely tied to the simulator software of your choice, you would most certainly need a state-of-the-art CPU, plentiful RAM, and a herculean GPU. Tabulated below are the minimum system specifications for 3 of the most popular flight simulators going around.
| Specification | Microsoft Flight Simulator 2020 | X-Plane 11 | Prepar3d |
|---|---|---|---|
| CPU | Intel i5-4460 or AMD Ryzen 3 1200 | Intel i3, i5, or i7 with 2 or more cores or equivalent AMD | Any CPU with a clock speed in excess of 2.0 GHz |
| Memory | 8 GB | 8 GB | 2 GB |
| Storage | 150 GB | 20 GB | 30 GB |
| GPU | Radeon RX 570 or Nvidia GTX 700 | Any DirectX 11-capable video card from Nvidia or AMD | Any video card with Full DirectX 11 support |
| Video RAM | 2 GB | 512 MB | 1 GB |
| Operating System | Windows 10 | Windows 7, 8, or 10, 64-bit | Microsoft Windows 7 (32-bit) |
It is worth mentioning, however, that rigs with minimum specifications are practically unusable. They make up for lousy gameplay that is often full of lags. It is, hence, pertinent that you opt for a much beefier rig. In this regard, I would recommend buying a rig that features:
- Intel i5-8400/AMD Ryzen 5 1500X or better
- 16 GB RAM or better
- Nvidia GTX 970 or better
Even this configuration doesn’t guarantee a buttery-smooth 60-fps on high-fidelity flight simulators. For that, you’d need an all-powerful CPU and GPU pairing, somewhere in the range of Intel i7-9800X and Nvidia RTX 2080. You could go a step further by pairing Intel’s 12th-generation processors with Nvidia’s flagship RTX 3090. This configuration, featuring the best GPU for Flight Simulators, would not only guarantee a seamless flight experience but would also future-proof your investment.
Recommended Computer for Flight Simulator: MSI’s Aegis RS Gaming Desktop
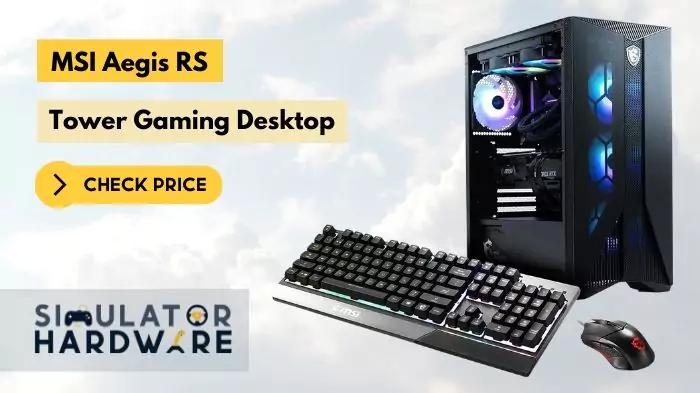
One such pre-built configuration is MSI’s Aegis RS Gaming Desktop. The mid-tower desktop from MSI may not feature a proprietary weirdly-aesthetic chassis or a sci-fi movie aura, but pairing 12th generation Alder Lake processors with Nvidia’s RTX 3080, it delivers peerless performance across almost all flight simulators. The rig is mostly made up of standardized MSI components, making it easy to upgrade when the need arises. Sure, it does have its flaws-middling transfer speeds, clunky software, and weird design choices- but if you are prepared to look beyond that, MSI’s Aegis RS Gaming Desktop is the perfect fit for your home flight simulator.
2. Display
Once you are done with rig selection, you can move on to the second most important piece of hardware, i.e., the display. The display determines the quality of your experience outside the virtual front window and holds the key to a realistic flight experience. As far as flight simulators are concerned, you have 3 display options: the traditional monitor, relatively-new projector, and the ultra-modern VR.
Monitor vs Projector vs VR for Flight Simulators
Traditionally, projectors have been considered a niche bit of tech and monitors have been the go-to choice for almost everybody. Over the last few years, however, things have changed. With rapid advancements in technology, projectors and TVs are closer than they have ever been, although the latter are still more widely used.
Projectors offer screen sizes and space efficiency that TVs can’t just compete with. Sure, monitors have grown bigger and bigger over the years, but how do you compete with a device throwing images onto a wall? Unsurprisingly, projectors also offer better prices per inch, at least in FHD. True 4K projectors are rare and insanely expensive.
Monitors, on the other hand, offer better visual quality. 4K resolution is almost standardized, and LED/OLEDs make up for vibrant and colorful images. Not to mention, with TVs you do not have to worry about the brightness of the surroundings, and can just go about your business unconcerned. It is also worth mentioning that TVs offer better audio quality, although audio, on its own, is hardly an apposite metric.
Choose a projector over a monitor if and only if:
- You are constrained by space
- Have a big budget (for UHD)
- Consider screen size king
- Have a spare wall for projection
- Have no compunction about getting a separate sound system
VR headsets, on the other hand, aren’t alternatives to monitors. For starters, you need to install dedicated software on your computer for mirroring the screen onto the headset and launch this software every time you connect your device to the pc. Secondly, headsets are uncomfortable in the long run. They apply pressure to your nose, forehead, and face in general, necessitating a break every 30-90 minutes.
All in all, you can have a headset as an accessory, but headsets of today are not monitor replacements. You will need either a monitor or a projector to go with your VR Head-mounted display.
Monitor
As mentioned already, monitors are the go-to choice for almost everyone and a choice that you can’t really go wrong with. Before you buy one though, you should consider a few things including, but not limited to, size, resolution, refresh rate, and setup preference. It is worth mentioning that a detailed discussion of these points is beyond the scope of this article, and merits a guide of its own.
Size, resolution, and refresh rate
With regards to size, bigger isn’t always better. Sure, bigger monitors can ensure larger coverage, leading to better immersion. Then again, they limit your field of view and can cause pixelation if screen resolution, and consequently pixel density, is low. In this regard, I would recommend monitors with a pixel density of 109 pixels per inch (PPI) for an optimal experience. This roughly translates to the ‘Resolution to Optimal Monitor Size’ table below.
| Screen Resolution | Optimal Monitor Size |
|---|---|
| 1080p | 24 inches |
| 1440p | 27 inches |
| 4K | 32 inches |
Screen resolution, on the other hand, is free from such limitations, i.e., higher is always better. It is pertinent to mention, however, that state-of-the-art 4K monitors are overkill unless you own top-of-the-line Nvidia or AMD GPUs. A wiser decision, in such cases, would be to opt for QHD monitors instead.
Typically, refresh rates also follow the same rule-higher is always better. With both Microsoft Flight Simulator and X-Plane 11, however, refresh rates in the excess of 60 are rare, if not utterly non-existent. Hence, any modern gaming monitor with a refresh rate above 75 Hz would do just fine.
Curved monitors and Multi-Monitor setup
Ultra-wide curved monitors offer a wider field of view and make up for an ultra-immersive flight experience. They are also less straining on the eyes, and consequently, very popular amongst simmers. They do have their flaws, however, as they are prone to glare and support limited viewing angles. If you opt for a curved monitor, make sure you understand the specs. A monitor with 1800R curvature, for instance, has a curved radius of 1800 millimeters and a recommended max viewing distance of 1.8 meters.
Some simmers prefer a multi-monitor set-up, opting for two, or in some cases, 3 monitors. Again, this is aimed at improving the field of view. While X-Plane and Prepar3d support multiple monitors, MSFS 2020 doesn’t offer any real multi-monitor support. You can, however, still achieve it via various ways.
Recommended Monitor for Flight Simulator: ROG Strix XG32VQ

Only a few months ago, our editorial team ranked ASUS’s ROG Strix XG32VQ the best monitor for flight simulators and I see no reason to change that. Featuring a classy design, QHD resolution, decent response time (4 milliseconds), a respectable refresh rate (144 Hz), and FreeSync support, ASUS’s display has it all. It makes up for vibrant and colorful images (owing to its 125% sRGB color space gamut) that will, surely, bring your gameplay to life. Not to forget, the QHD display also features an ergonomic design, supporting extensive tilt, swivel, and height adjustments. All of these, and many more intricate features, make ASUS ROG Strix XG32VQ the best monitor for flight simulators in 2023.
Projectors
Not so long ago, the term “projectors” prompted the image of an outdated device casting a barely-visible image onto a pull-down white screen. Recent technological advancements, however, have meant that projectors are comparable to monitors with regard to image quality all while offering a much more immersive experience. It is worth noting, though, that not all projectors are made equal and you need to ensure due diligence with respect to:
Input Lag
Input lag refers to the time it takes the screen to display the results of your actions, i.e., using a controller or remote. A high input lag is a perfect recipe for disaster and one of the most pervasive issues amongst gaming projectors. An input lag in the range of 32-40 milliseconds would put you 2 frames behind on flight simulators running at 60 fps and is generally considered acceptable. An input lag below 16 milliseconds is truly extraordinary and definitely overkill if you just want to fly some aircraft.
Refresh rate and Screen Resolution
Representative of how fast your projector switches frames, a projector’s refresh rate is no different from a monitor’s. So, anything above 75 Hz would do just fine. Projectors with a refresh rate of 120-144 Hz are definitely a better bet, given you can afford one, but anything in excess of that is overkill.
The same holds for screen resolution. Be extra careful, though, as most brands put out the screen resolution that a projector can receive and not one that it can actually display. Look out for the native resolution of the projector.
Luminosity
In layman’s terms, luminosity refers to a projector’s brightness. In dark environments supported by shades, brightness is a non-issue as a few hundred lumens can get the job done. In less-than-ideal circumstances, however, the lack of brightness may result in washed-out graphics. Simmers facing such circumstances should look out for projectors with a brightness of at least 2000-2500 lumens.
Image Size
Arguably, a projector’s biggest selling point is its image size. Not only can you attain variable-sized images, but you can also cast displays well beyond the realms of TV sizes. You need to be considerate of your environment, though, because a projector’s distance from the screen determines the image size. In this regard, you get to choose between long-throw and short-throw projectors. While the former needs a few feet of space, the latter can make do with a foot or two. Hence, if you face space constraints, opt for short-throw projectors.
Recommended Projector for Flight Simulator: Optoma’s UHD38
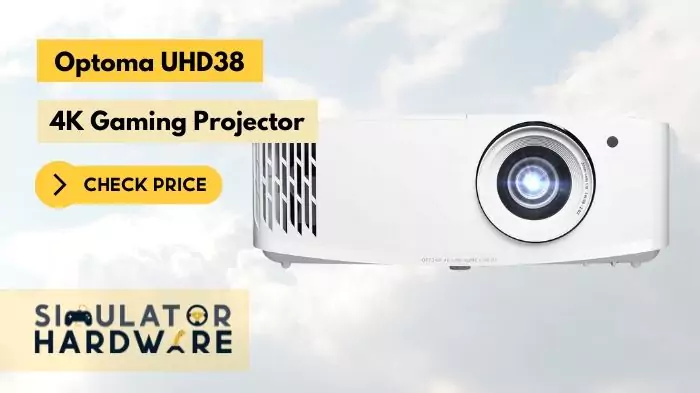
On a performance-to-value spectrum, it is hard to compete with Optoma’s UHD38. The long-throw projector goes all-out on resolution and speed, allowing users to cast 4K images as big as 300-inches. You can also switch to 1080p at 240 Hz and enjoy ultra-smooth gameplay with an input lag of just 4.2 milliseconds. Optoma’s offering also has a brightness of 4000-lumens, ensuring amicable performance even in well-lit rooms.
VR Headset
With flight simulators being some of the most ambitious games on the planet, sometimes even 4K monitors or projectors can’t do justice to a sim’s realism. The pairing of a flight simulator and VR headset, on the other hand, makes up for the single most immersive virtual flight experience. Not all VR headsets, though, are created equal and you will need to ensure due diligence to pick the right VR headset for you amongst the handful of products available in the market.

Tethered vs Standalone Headsets
The first point of contention that you need to settle is whether you want a tethered headset or a standalone one. As described comprehensively in our dedicated guide on the best VR headsets for flight simulators, tethered headsets are more powerful and can handle more graphically intensive tasks. They are, however, more restrictive with a cord connected to the gaming pc. If you want a VR headset only for flight simulators, though, the restriction doesn’t matter as user movements are limited.
Image Quality
Resolution, refresh rate, and Field of View (FOV) are some of the metrics for picture quality. Theoretically, the higher these numbers, the better the display. In all practicality, though, there is often a trade-off between resolution, refresh rate, and FOV. Just remember, with respect to flight simulators, resolution reigns supreme, followed by the field of view. Refresh rate is secondary as most graphic cards will fail to breach the 60-fps barrier on the best flight simulators.
Comfort
When shopping for a VR headset, make sure it is comfortable because when you are soaring the skies in your Airbus 320, you will have absolutely zero regard for time. In my experience, double-padded headsets are worth every single penny you spend on them. Some people, however, disagree, complaining the padding cuts off the circulation to their faces. Try out some headsets to figure out what works for you.
Recommended VR Headset for Flight Simulator: HP’s Reverb G2
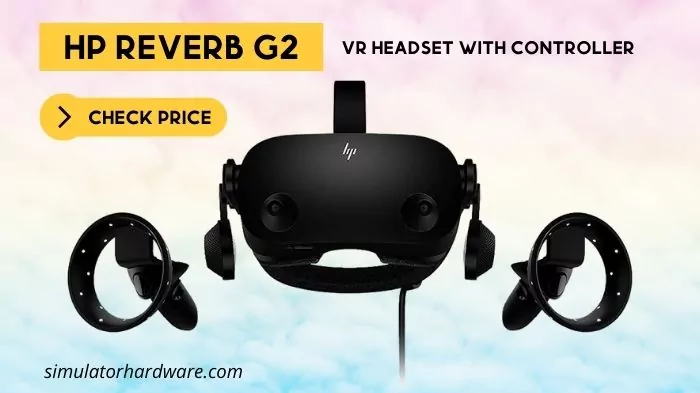
From a strictly Flight Simulator perspective, I will recommend HP’s Reverb G2. The VR headset has a scintillating 2160 x 2160 screen for each eye to go with pretty decent refresh rate (90 Hz) and Field of View (114 degrees). Sure, the Index Valve is a better VR headset overall, featuring better controllers and much more accurate tracking, but with flight simulators, you don’t need either of those things and resolution is king. In that domain, the Reverb G2 comfortably beats the Index Valve. Not to forget, it comes at a much better price point and is much more convenient.
3. Controllers
Now that you have your base set up, the next step in building a home flight simulator would be to get something to control your simulated aircraft. Possible options include Flight Sticks, Yokes, Rudder Pedals, and Throttles. One of the key decisions you will have to make at this point is whether you want a flight stick or a yoke.
Flight Stick vs Yoke
As elaborated further in our detailed guide on the best Yokes for Flight Simulator, the decision ultimately comes down to personal preference and/or the type of aircraft you are going to fly. If your preferred aircraft uses a stick, you get a flight stick. Similarly, a yoke is more apt for flying, no prizes for guessing, yoke planes. Fly combat aircraft, helicopters, and airbus jets use flight sticks. Almost all other planes use yokes.
What if you fly both? Well, in that case, you can either go all out and buy both or opt for one and compromise on realism while flying a few planes. In my experience, a flight stick works better on yoke planes than a yoke on stick planes, but that’s just one opinion.
Objectively, yokes are generally more immersive than flight sticks. They are costlier too, not least because you also have to buy rudder pedals. Most flight sticks, on the other hand, have the rudder axis built into them. HOTAS (Hands on Throttle and Stick) setups even come with a throttle and are self-contained units capable of precisely manipulating both speed and direction.
Flight Stick
If you opt for a joystick, which I must admit is an impeccable entry-level option, ensure:
Comfort
It is not uncommon for simmers to go for hours on end, so make sure your preferred flight stick features an ergonomic design. This way your hands and fingers would wrap around the flight stick and throttle naturally and spare you the cramps and strain. In this regard, the intuitive positioning of buttons also helps.
Adjustable Stick Tension
A stiff flight stick makes up for choppy and unnatural movements. Too loose a flight stick, on the other hand, can feel toyish and plasticky. What doesn’t help, either, is that there is no one-meets-all solution to the problem. Some people prefer their sticks loose for easy and fluid movements. Others like to feel the heft of the controller. So, unless you are sure the product of your choice meets your requirements, look out for a stick with adjustable tension.
Plentiful Buttons & Switches
While you can always map controls to your keyboard, make sure your preferred product has at least 4 buttons and a hat switch. It is worth mentioning, though, that with modern flight sticks, this is hardly an issue as most sticks go overboard with buttons and switches.
Z-axis Rotation
The Z-axis rotation refers to how far the flight stick can spin on its bottom axis. It is responsible for controlling the “yaw” in flight simulation games. While yaw is more important in space sims than in airborne flight simulators, err on the side of caution and opt for a flight stick with the Z-axis rotation. It will save you hundreds of bucks that you’d otherwise spend on rudder pedals.
Recommended Product for Flight Stick: Thrustmaster’s T.16000M FCS
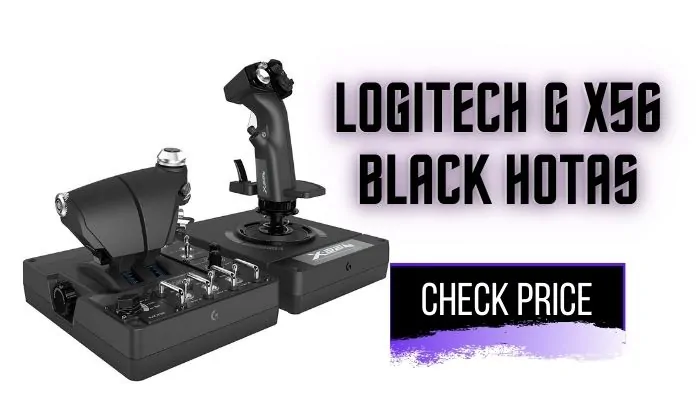
When you factor in quality, comfort, functionality, and value of money, Thrustmaster’s T.16000M FCS is, inarguably, the best flight stick for Flight Simulators. It is precise to the tee and features 4 independent axes. Although the joystick is not exactly premium, it makes up for comfortable flight sessions and offers plenty of programmable controls.
Recommended Product for Flight Stick: HOTAS Warthog Flight Stick

It is worth mentioning, however, that the aforementioned flight stick isn’t aimed at enthusiasts. Another Thrustmaster offering, the HOTAS Warthog Flight Stick, serves that purpose. Not only is it more robust and precise than any other flight stick on the market, but it is also cast entirely out of metal, ensuring unparalleled performance over a very long time.
Yoke
Most of the aforementioned points apply to yokes as much as they apply to flight sticks. Comfort, for one, is paramount and a good yoke will always have numerous programmable buttons and switches. There are few other things to look out for, however, when you buy a yoke. These include:
Compatibility
While this applies to joy sticks as well, it is much more significant a factor in yokes. Make sure the yoke is compatible with the flight simulator software as well as the panel (in case you opt for a ready-made panel).
Functionality
Besides customizable programmable and switches, a yoke can have many additional functions. These features, include, but are not limited to:
- Engine throttles
- Built-in display with timer
- Realistic switches
- Trim wheel
All these features are pretty desirable, so look out!
Central Detent
Most yokes have a central detent which leads to exaggerated or, in some cases, unnoticed inputs. To further exacerbate the problem, most yokes don’t do a complete 90-degree rotation on each side. While you get used to such yokes in the long run, the problem is, often, not negligible. Hence, avoid such yokes as much as you can.
Ease of Use
Some yokes come with pre-configured basic functions and offer plug-and-play functionality. Others need to be configured before use. No prizes for guessing which ones are more convenient.
Before you buy a yoke, do consider mounting options available to you. If you have a thick desk, buy a yoke with a suction cup because clamps just won’t do.
Recommended Product for Yoke: Redbird’s Alloy YK1
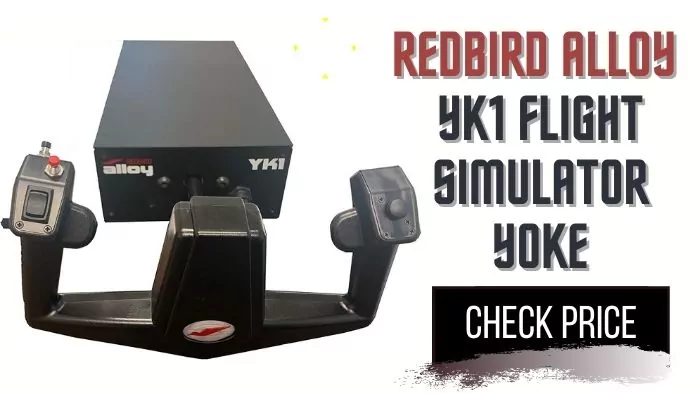
If you are willing to spend money typically associated with a graphics card on a yoke, go straight for Redbird’s Alloy YK. The Redbird is unparalleled in its performance and is, virtually, indestructible. Sure, it does take up a lot of desk space, but that’s just about it.
Recommended Product for Yoke: Honeycomb’s Aeronautical Alpha Flight Controls Yoke
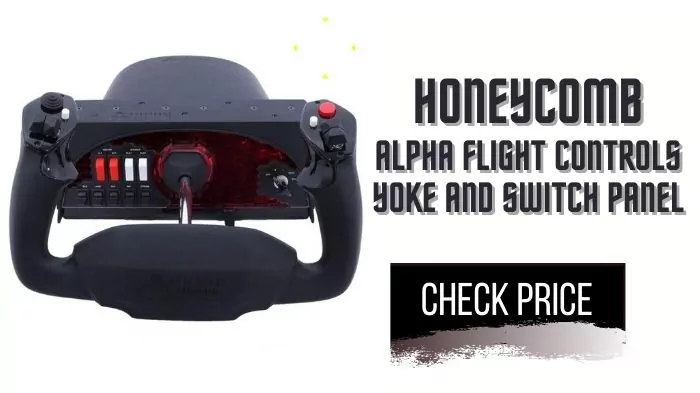
If you are on the hunt for something cheaper, go for Honeycomb’s Aeronautical Alpha Flight Controls Yoke instead. Only a few months ago, the yoke was ranked by our editorial team as the best yoke for flight simulators and while it is no Alloy YK1, Honeycomb’s offering features a premium build, sturdy design, dual-mounting options, and offers all basic yoke functionality.
Throttle
Most users won’t need a throttle. If your yoke has engine management abilities, or your flight stick has a slider for throttle, you can totally make it work, especially on slower games like Microsoft Flight Simulator. For a precise flight and a more immersive experience, however, you will need fine speed control. So, if you decide on buying one, look out for the following factors:
Throttle Levers
Make sure the throttle quadrant has at least 3 levers. These come in handy while you are flying multi-engine aircraft, allowing you to control more engines, gears, flaps, spoilers, etc. It is pertinent to mention that you won’t need 3 levers in most cases, but having them never hurts. Excess levers future-proof your investment, in case you want to shift to another plane or flight simulator, and can always be mapped to other controls.
Mounting Options
Most throttle quadrants are freestanding, with the quadrant’s weight keeping them in place. The very best throttle quadrants, however, offer multiple mounting options. As is the case with yokes, clamps are secure but don’t work on thick desks. In such cases, make sure the throttle quadrant offers suction cups or other mounting options.
Configuration
A throttle quadrant can only offer so many configurations. So, if you intend to replicate a particular cockpit, look out for a quadrant designed specifically for that simulation. For instance, if you intend to replicate the Airbus A320 cockpit, go for TCA Quadrant Airbus Edition.
Also, while it is not mandatory, it is best to go with the yoke and throttle quadrant of the same company. As most products come in pairs, this shouldn’t be too hard.
Recommended Throttle for Flight Simulator: Thrustmaster’s TCA Quadrant Airbus Edition
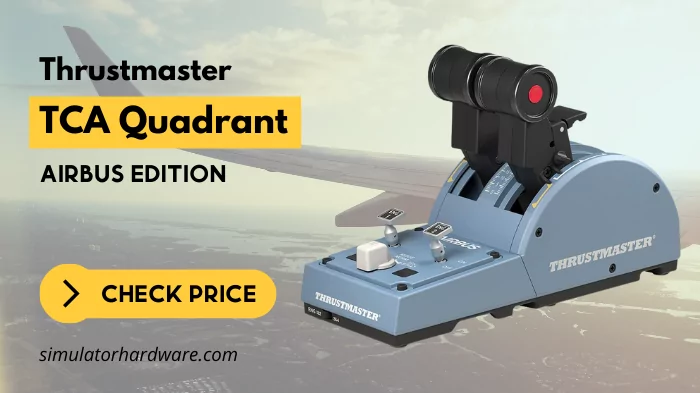
Only six months ago, the editorial team and I ranked Honeycomb’s Bravo Throttle Quadrant as the best throttle quadrant for flight simulators, and nothing has changed. Cast with high-grade ABS plastic and able to emulate 2 and 4-engine aircraft, Honeycomb’s offering presents a rare one-fits-all solution to all your aviation needs. Pair it up with Honeycomb’s Aeronautical Alpha Flight Controls Yoke and enjoy an ultra-realistic and immersive flight experience.
A major problem with the Bravo Throttle Quadrant is that it seems to be stuck in an eternal state of being out of stock. In such cases, opt for the second-best option available, i.e., Thrustmaster’s TCA Quadrant Airbus Edition. It is reasonably priced, durable, precise, and as authentic as any throttle quadrant out there.
Rudder Pedals
A set of rudder pedals is another peripheral that you probably don’t think you need until you have tried it, and then there’s no going back. Most people tend to ignore rudder pedals, thinking that a yoke and throttle have them set for highly immersive virtual aviation (can’t fault them because it is actually true). Others with flight sticks don’t even bother looking up for rudder pedals because most joysticks enable yaw control by twisting the handle. Yet, rudder pedals add an immense amount of realism to your simulator and are instrumental in an authentic flight experience, so much so that I would highly recommend getting the pedals, even if it means cutting down on other controllers. If you decide to get them, here are a few things to look out for:
Functionality
Adjustable resistance, differential braking, and adjustable foot pedals are a must for any set of rudder pedals. Other desirable features include, but are not limited to, force feedback, and a self-centering mechanism. Keep an eye out for these features.
Build Quality
Some rudder pedals are made of plastic; others feature steel and aluminum construction; the most premium models are cast entirely out of steel. While the material used in construction is directly linked to the financial commitment required, build quality also varies amongst products made out of the same material. Hence, go for a pair that looks and feels sturdier.
Comfort and Convenience
Like all peripherals, comfort is paramount. Prefer products that offer foot pedals that are adjustable and made of non-slip material. Also, look out for rudder pedals that offer mounting options and come pre-configured (setting them up is some hassle).
Recommended Rudder Pedal for Flight Simulator: Logitech G Pro
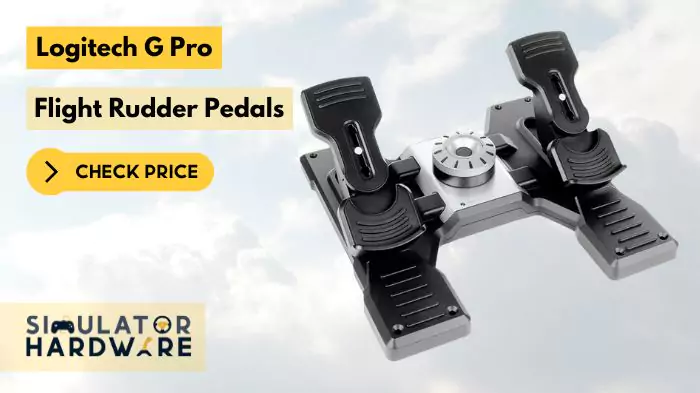
I would recommend getting Logitech G Pro Flight Rudder Pedals, which are the best rudder pedals for flight simulators factoring in functionality, build quality, and value of money. Besides precise rudder and braking control, Logitec’s offering features partial metal construction, a self-centering mechanism, and adjustable tension.
Full Review and Verdict: Read our editor’s opinion of Logitech G Pro Flight Rudder Pedals
Recommended Rudder Pedal for Flight Simulator: Thrustmaster TFRP Rudder

A viable alternative is Thrustmaster TFRP Rudder, which is less realistic than its Logitech counterpart but makes up for its shortcomings with its value proposition.
4. Accessories
Now that you have your lifelike controllers, you can tune into your flight simulator software and soar the skies like real pilots. To further enhance your in-game experience, get your hands on flight simulator accessories like Flight Switch Panel, Flight Instrument Panel, and headsets.
Flight Switch Panel
Flight switch panels offer you real-world toggle switches, providing a tactile feel that often eludes digital games. They can be used to turn on/off literally everything, ranging from avionic lights to master ignition. A major problem with switch panels is compatibility. Even the best simulator software like MSFS 2020, provide limited support for switch panels.
Recommended Product: Logitech’s Flight Switch Panel
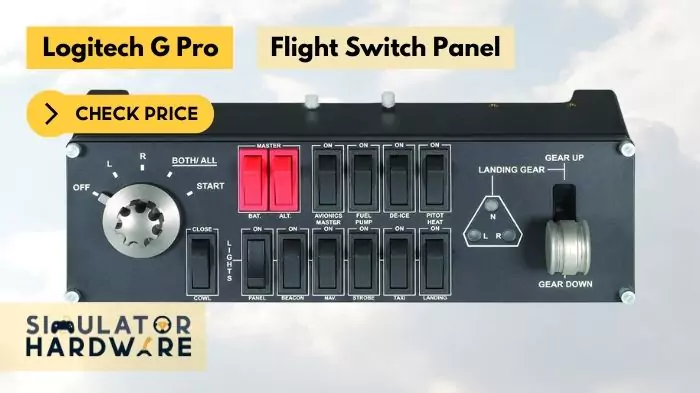
In such circumstances, I would recommend Logitech’s Flight Switch Panel which is compatible with Microsoft Flight Simulator 2020, Flight Simulator X, X-Plane, and even Prepar3D. The panel features a five-position magneto dial, a gear up and down level, 13 customizable switches, and built-in lights, making it the perfect product for extending your flight sim’s functionality.
Flight Instrument Panel
If you are even remotely associated with aviation, you’d know that pilots seek input from a number of instruments and gauges to safely fly a plane. Instrument panels feature an array of dials, lights, and gauges to monitor the performance of the aircraft. While not integral to virtual aviation, flight instrument panels can greatly enhance the realism of your home flight simulator, especially if you use a handful of them together.
Recommended Product: Logitech G Pro Flight Instrument Panel
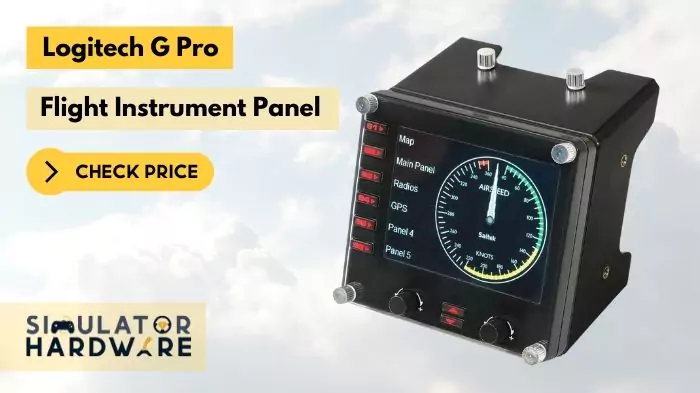
As far as panels are concerned, Logitech reigns supreme. The company makes some of the best products available on the market, and its Logitech G Pro Flight Instrument Panel is no different. The panel features a colorful 3.5-inch screen and is able to display 15 navigable readouts.
Headset
To complete your home flight simulator hardware, you would also need a headset. Sure, you can make do without one, but a decent headset would let you appreciate the work that has gone into a game’s ultra-realistic sound design and also save your parents and siblings from the unwanted noise.
It is, however, worth mentioning, that if you already own a gaming headset, you can skip this section and move on to the next step. If you don’t, look out for a gaming headset that emphasizes comfort, voice clarity, and audio customization.
Recommended Product: Thrustmaster’s T. FLIGHT Gaming Headset

For virtual aviation, I would recommend Thrustmaster’s T. FLIGHT U.S. AIR FORCE EDITION GAMING HEADSET. Inspired by real aviation headsets and licensed by the U.S Airforce, the gaming headset is as authentic as it gets. It is exceptionally comfortable as well, featuring large memory foam earpad cushions and a layer of gel that would keep your ears cool during long sessions of flight.
Step 6: Get yourself a comfortable seat
The final step in setting up a home flight simulator is getting yourself a cozy chair for your adventures. Office and gaming chairs are some of the options available to you and a great one at that solely based on the sheer volume of options available. That being said, specialized sim seats are a better bet because they feature pre-drilled attachments for add-ons of your choice. You can use these attachments as a base for your controllers.
Recommended Seat for FLight Simulator: Playseat Air Force
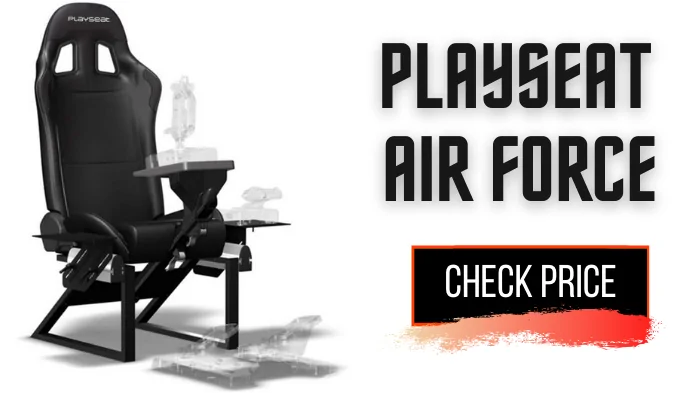
One such chair is the Playseat Air Force which also happens to be one of the best chairs for flight simulators. Playseat’s offering features a classy leatherette exterior, can support people weighing up to 270 lbs and is as comfortable as they come. For other similar options, you can check out our dedicated guide on the best seats for flight simulators that covers both seats and ridiculously extravagant cockpit platforms.
If you are on the DIY bandwagon, you can even pull one out of an old car. If you don’t have one sitting in your driveway, visit the nearest junkyard. Car seats are comfortable and make for great flight sim chairs given you can fit in them. The only flipside of using a car seat as a flight sim chair is that they harder to mount. Unlike new seats, they do not have mounting points for universal installation; you will need wooden shims to make them sit right.
Step 7: FLY!
By following the above-mentioned steps, you should be able to build your home flight simulator. So, what are you waiting for? The skies are waiting!
Conclusion
Building a home flight simulator is a tricky process but one that doesn’t necessarily need to be hard. Indeed, if done right, it can be very rewarding. In this guide, we covered the step-by-step procedure of building a home flight simulator and outlined the major factors involved in selecting components for your in-home flight simulator. We hope you find this guide helpful and have fun building your very own cockpit.

This guide is priceless! Thanks for compiling all the information together. Thumbs up!
Glad that you liked the post. Thanks a lot for your time and comment. 🙂
I was looking for the guides on building up flight cockpit and finally reached this page. Although it seems a little bit longer to read yet it’s the most comprehensive guide available on this time. Thanks a lot for your efforts! Going to share it on my profile.